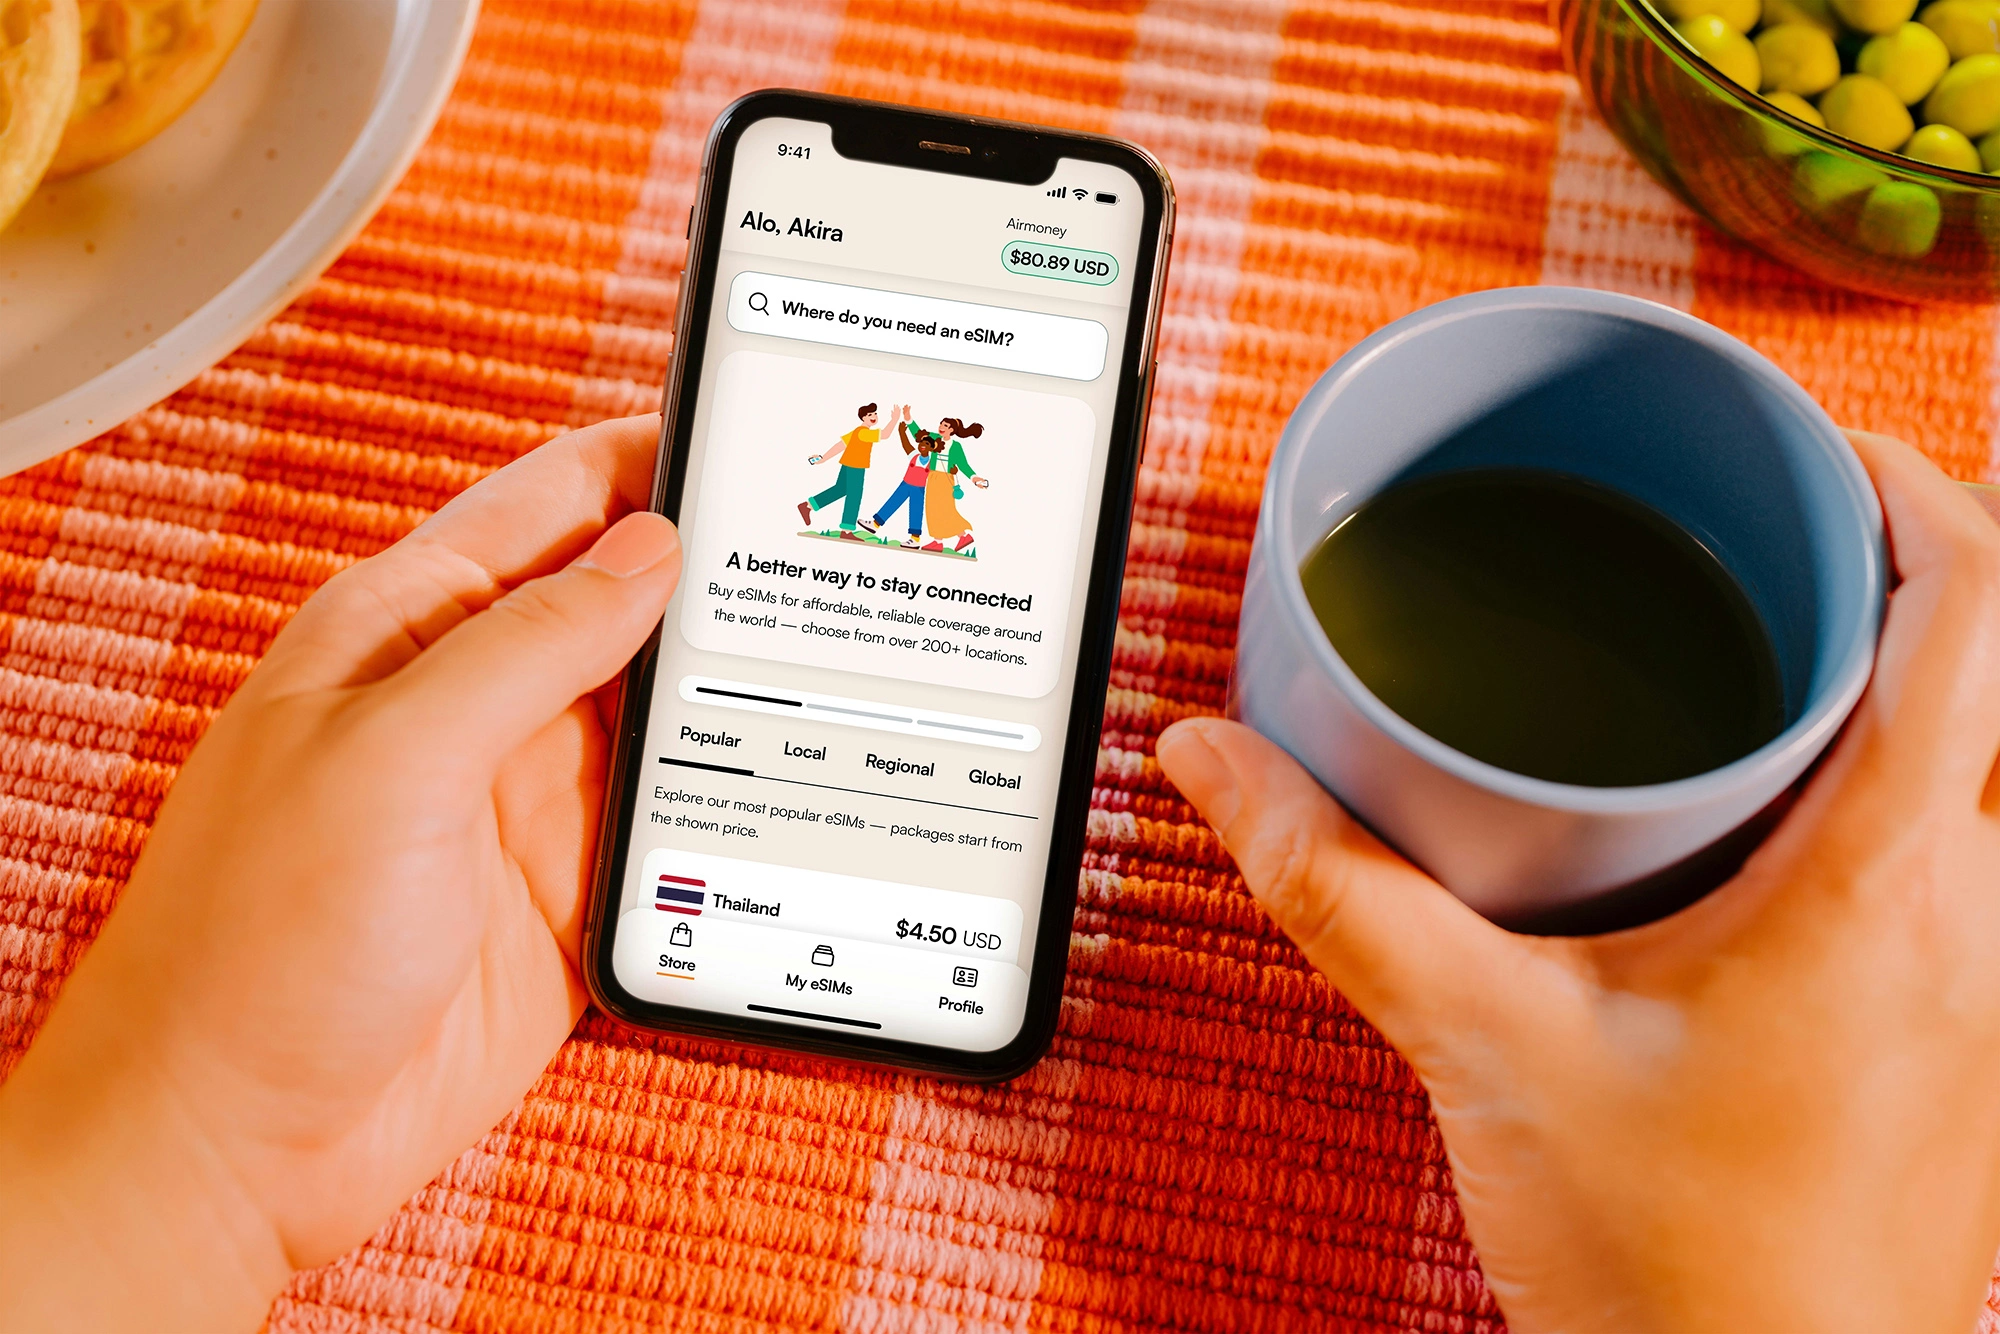
You shouldn’t have to hunt for airport Wi‑Fi or brace yourself for an eye-watering phone bill every time you cross a border. If you want dependable data the moment you land, an eSIM can be your smartest travel upgrade—helping you avoid international roaming charges while keeping maps, ride-hailing, translations, and travel updates right in your pocket. In this guide, you’ll learn what an eSIM is, why many travelers consider it the best global eSIM for travel, and how to compare prepaid travel data plans based on coverage, speed, and value. You’ll also get a clear walkthrough on how to activate eSIM with Megarefill, plus practical tips to manage your data so you stay connected from takeoff to touchdown—without the usual hassle.
What is an eSIM and Why Every Traveler Needs One?
An eSIM (embedded SIM) is a digital SIM built directly into your phone, tablet, or smartwatch, letting you connect to mobile networks without inserting a plastic card. Instead of hunting for a local SIM kiosk after a long flight, you can set up service by scanning a QR code or installing a carrier profile in your device settings. As a result, you go online faster, keep your primary number active, and stay in control of your travel connectivity.
For modern travel, an eSIM is especially useful because it helps you avoid international roaming charges while still giving you reliable mobile data for maps, ride-hailing, translation apps, and messaging. Additionally, it’s a smart option when you want prepaid travel data plans that match your trip length and budget—no contracts, no surprise bills, and no wasted time.
If you’re trying to find the best global eSIM for travel, focus on coverage, straightforward setup, and clear data allowances. Once you choose a plan, learning how to activate eSIM usually takes only a few minutes, so you can get connected before you even leave the airport.
Physical SIM vs. eSIM: The Major Differences
Here’s how they compare in real-world travel situations:
- Setup method: Physical SIM requires swapping cards; eSIM installs digitally via QR code/app.
- Convenience: eSIM reduces hassle—no tiny trays, pins, or losing your home SIM.
- Flexibility: You can store multiple eSIM profiles and switch between them in settings.
- Security: eSIM can’t be physically removed if your phone is lost, which adds a layer of protection.
- Speed to connect: With eSIM, you can buy and install a plan before departure, then land already online.
Top Benefits of Using Global eSIMs for International Travel
A global eSIM upgrades the way you stay connected abroad because you can buy data digitally, install it in minutes, and switch plans without hunting for a local SIM shop. As a travel enthusiast, you’ll feel the difference immediately: you spend less time troubleshooting mobile service and more time navigating, booking, and sharing your trip in real time. If you’re searching for the best global eSIM for travel, the biggest advantages come down to cost control, convenience, and flexibility.
Say Goodbye to Expensive Roaming Fees
International roaming can quietly drain your budget, especially when you’re using maps, ride-hailing apps, and social media every day. With a global eSIM, you can avoid international roaming charges by selecting prepaid travel data plans that match your itinerary and usage. Instead of unpredictable post-trip bills, you get upfront pricing and clear data allowances. Additionally, you can top up when needed, which helps you manage costs as your plans change—whether you extend a stay or add a stopover.
Key benefit: You control spending with prepaid data, not carrier surprise fees.
Keep Your Original Number While Staying Connected
When you travel, you still need your primary number for bank texts, two-factor authentication, and important calls. A global eSIM lets you keep your physical SIM (and number) active while using eSIM data for everything else. As a result, you can message, navigate, and book tickets on eSIM data while your regular line remains reachable.
How-to tip: Check your phone settings for “Cellular Data” and set the eSIM as your data line; that’s often the simplest way to begin if you’re learning how to activate eSIM without disrupting your main number.
How to Choose the Right eSIM Plan for Your Destination
Choosing an eSIM plan is easiest when you start with your itinerary and your phone habits. First, list every country you’ll visit, then estimate how you’ll use data (maps, ride-hailing, video calls, social posting, or remote work). Next, compare plans based on coverage, data amount, and duration so you can avoid international roaming charges without sacrificing speed or convenience.
Regional vs. Local eSIM Plans: Which is Better?
A local plan is usually the smartest pick when you’re staying in one country for a while and you want strong in-country performance at a lower price. In contrast, a regional plan works best when you’ll cross borders—because you won’t need to buy and set up a new plan in every stop. As you compare options, treat coverage like a checklist: confirm your exact destinations are included, not just “Europe” or “Asia” in general. If you’re visiting multiple countries, a regional plan often feels like the best global eSIM for travel because it reduces setup time and keeps you connected from arrival to departure.
Evaluating Data Limits and Validity Periods
After you settle on local vs. regional, match the plan to your usage and trip length. A good rule: light users (maps, messaging) can go smaller, while frequent uploaders or remote workers should size up to avoid mid-trip top-ups. Also, check whether the plan expires in 7, 15, or 30 days—and when that countdown starts (at purchase, installation, or first connection). These details matter if you’re buying prepaid travel data plans before you leave.
Quick selection checklist
- Coverage: Verify all countries/cities on your route
- Data amount: Estimate daily needs and add a buffer
- Validity: Align expiration with your travel dates
- Setup clarity: Make sure instructions clearly explain how to activate eSIM

Step-by-Step Guide: How to Activate Your Megarefill eSIM
Activating your Megarefill eSIM is a quick setup you can finish before takeoff or right after landing. Once it’s installed, you’re ready to connect abroad and avoid international roaming charges while keeping full control over your data spend with prepaid travel data plans.
Checking Device Compatibility (iPhone & Android)
Before you start, confirm your phone supports eSIM and is unlocked. This takes a minute and prevents activation hiccups later.
- Make sure your device is eSIM-capable
- iPhone: Go to Settings → Cellular (or Mobile Data). If you see Add eSIM (or Add Cellular Plan), you’re good.
- Android: Go to Settings → Network & Internet → SIMs (path varies). Look for Add eSIM or Download a SIM instead.
- Confirm your phone is unlocked
- If your device is locked to a carrier, the eSIM may not install or may not connect properly.
- Stable connection required
- Use reliable Wi‑Fi during installation to reduce errors.
Once you’ve confirmed compatibility, you’re ready for the fastest method for how to activate eSIM—a simple QR scan.
Installing via QR Code in Seconds
Megarefill typically provides a QR code after purchase. Keep it on a second screen (laptop/tablet) or print it, then follow these steps:
- Open eSIM settings
- iPhone: Settings → Cellular/Mobile Data → Add eSIM
- Android: Settings → Network & Internet → SIMs → Add eSIM
- Scan the Megarefill QR code
- Choose Use QR Code and scan when prompted.
- Label your plan
- Name it “Megarefill Travel” so you can spot it easily later.
- Set data preferences
- Select the Megarefill line for Cellular Data/Mobile Data during your trip.
- Turn on Data Roaming for the eSIM only (if required)
- Many travel eSIMs need this enabled to connect; keep roaming off for your primary SIM to stay protected from extra fees.
Quick tip: If you’re comparing options for the best global eSIM for travel, Megarefill’s QR setup is ideal because you can install it in advance and switch data lines when you’re ready to go.
Managing Your Data While on the Road
Staying connected abroad is easy with an eSIM, but you still need a simple system to keep your usage under control. When you manage data proactively, you can avoid international roaming charges and stretch your allowance further—especially if you’re using prepaid travel data plans that come with a fixed amount of GB.
Start by tracking usage daily. On iPhone, go to Settings → Cellular to review data use by app; on Android, check Settings → Network & Internet → SIMs/Data usage. Then, set a personal “daily budget” (for example, 500MB/day) so you always know whether you’re on pace. Next, configure alerts and limits. Many Android devices let you set warnings and hard caps, while iOS users can rely on Low Data Mode plus more frequent manual checks.
Also, prioritize Wi‑Fi intentionally. Use hotel or café Wi‑Fi for heavy tasks like cloud backups, updates, or video calls, and save mobile data for maps, messaging, and bookings. This approach helps you get the most value from the best global eSIM for travel without getting surprised mid‑trip.
Tips to Reduce Data Consumption During Travel
Limit background activity: Turn off app refresh and restrict background data for high-usage apps (social, streaming, cloud storage).
Use low-data settings: Enable Low Data Mode/Data Saver and reduce streaming quality on YouTube, Netflix, and Spotify.
Download ahead of time: Save offline maps, playlists, tickets, and translations before you head out.
Control updates and backups: Disable auto-updates and pause photo backups on mobile data until you’re on Wi‑Fi.
Tether smartly: If you hotspot a laptop, close syncing apps and browser tabs to prevent silent data drains.
Keep activation handy: Save the setup steps or QR code in your notes so you always know how to activate eSIM again if you reinstall or switch devices.
Conclusion: Experience Seamless Connectivity with Megarefill
If you want consistent connectivity across borders, you’ll get the smoothest setup by treating your eSIM like a pre-trip essential—just like your passport and travel insurance. Start with a quick compatibility check on your phone (look for eSIM support in your device settings), then choose your Megarefill option based on how many countries you’ll visit and how long you’ll stay. This approach helps you lock in prepaid travel data plans before you fly, so you’re not hunting for a SIM shop after landing.
Next, install and set it up before departure. Follow the provider’s steps for how to activate eSIM (usually scanning a QR code or entering an activation code), then label the plan clearly (for example, “Megarefill Travel Data”). After that, set your eSIM as the preferred mobile data line and keep your primary SIM for calls if you need it.
Finally, travel smarter with predictable costs. You can avoid international roaming charges by turning off data roaming on your primary SIM, monitoring usage in your phone’s data settings, and topping up as needed. If you’re comparing options, aim for the best global eSIM for travel by prioritizing coverage, network partners, and straightforward top-ups that match your itinerary.
Frequently Asked Questions
What is a global eSIM, and how does it help you avoid roaming fees while traveling?
A global eSIM is a digital SIM profile you download to your phone, replacing (or supplementing) a physical plastic SIM card. Instead of paying your home carrier’s roaming rates, you install an eSIM data plan that works in one country, a region, or multiple countries worldwide. Once activated, your phone connects to a local partner network at near-local pricing. That means you keep dependable mobile data for maps, rideshares, messaging, and travel updates without surprise bills. You can also store multiple eSIMs and switch plans as you move between destinations.
How do you check if your phone is eSIM-compatible and unlocked before you buy a plan?
Start by confirming your device supports eSIM and that it’s carrier-unlocked. On iPhone, you can look in Settings > Cellular (or Mobile Data) for “Add eSIM” or “Add Cellular Plan,” and in General > About for “No SIM restrictions” to confirm unlock status. On many Android phones, you’ll find eSIM options under Settings > Network & Internet > SIMs (or Mobile Network) with an “Add eSIM” button. If you don’t see the option, your model or region may not support eSIM. You should also verify your carrier hasn’t locked the device to prevent adding outside plans.
How do you install and activate an eSIM for international travel, and when should you do it?
You typically install an eSIM by scanning a QR code, tapping an activation link, or entering details manually in your phone’s cellular settings. For a smooth trip, install the eSIM while you still have reliable Wi‑Fi at home or at your hotel. Then choose a clear label like “Japan Data” or “Europe eSIM” so you don’t mix it up with your primary line. You can keep your normal SIM active for calls and iMessage/WhatsApp while using the eSIM for data, depending on your device. Activation timing varies: some plans start immediately, while others begin when you first connect in the destination country—so you should read the plan rules before you depart.
What should you do if your eSIM data isn’t working after you land in a new country?
If your eSIM won’t connect, you can troubleshoot step-by-step. First, confirm your eSIM line is turned on and set as the default for cellular data. Next, enable Data Roaming for the eSIM (many travel plans require it even though you’re not paying your home carrier’s roaming). Make sure airplane mode is off, then toggle it on and off to force a network refresh. If the plan supports multiple networks, try manual network selection and choose a different carrier. Check the APN settings only if your provider instructs it, because incorrect edits can break connectivity. Finally, restart your phone and verify you still have an active data balance and the plan covers your current country.
View all available eSIM countries and plans.


























 English
 Deutsch
 Español
 Français
 Italiano
 Português
 Türkçe
 Русский
 العربية
 हिन्दी
 中文(简体)
 日本語
日本語